Wednesday, August 28, 2013

Story Grammar Marker Instruction: Element ID & Oral Retelling

When choosing stories to use with my students, I make sure they are at least at the level of the Complete Episode since that is where the majority of my upper elementary kids are working towards.  A Complete Episode includes the following elements:


  • Characters:  Who or What is the story about?
  • Setting:  Where and When does the story take place?
  • Initiating Event (Kick Off):  What happened to the character to cause him/her/it to do something? (It was a ho-hum day until...)
  • Internal Response (Feeling):  How did the character feel about what happened?
  • Plan:  What does the character want to do?  Why will he/she/it choose this plan?
  • Attempts:  What actions do the character take to achieve the plan?
  • Direct Consequence (Tie Up):  What happened as a result of the attempts/actions?
  • Resolution:  How does the character feel about the direct consequence?  Is there a lesson learned or moral to the story?
After establishing that those elements are present, I fill out an organizer for myself.  This organizer template is provided with the program.  It looks like this:


It is definitely helpful to have this organizer filled out prior to the lesson otherwise it just never goes as smoothly as you planned!  


HOW I USE THIS WITH MY LANGUAGE GROUPS:

After I read the story to the group (I plan a whole 30-minute session for this), we move right into filling out this graphic organizer.  The picture above shows the Teacher Analysis Form which I use for myself to follow but when we fill it out as a group we use the student form.  The CD included in the SGM program has a couple different forms you can choose from.

My older students who can type at a decent speed usually fill the forms out themselves on their netbooks.  I put the form up on the SmartBoard and after we discuss an element, I have them put the sentence in their own words and I type it up.  That way they can easily just copy the sentence off the board and into their own document.  **As you can see in my form above I usually just write up quick notes, but when working with the kids I always have them use complete sentences.  


For my younger students, we fill out the form on the SmartBoard together.  To get them involved, I have them come up and write in their responses.  I have yet to meet a student who doesn't like writing on the SmartBoard :)

After we fill out the organizer, we go deeper into Character and Setting descriptions.  There are also forms for this type of activity on the SGM CD.  During these activities, I encourage the kids to use all their senses when describing so the reader/listener feels like they are there!  This in-depth description practice really helps set them up for a good oral retelling as they now have the tools to create a vivid image of the ho-hum day.

Once all of that is done, I have each of the kids orally retell the story using their organizer for support.  I usually record their retelling on my iPad using the QuickVoice app.  I make sure to tell them I do not want to hear "The Characters are _____.  The Setting is ___________." etc.  I want them to tell it as a story.  I usually have to help them out with this.  I tell them to set the scene (the ho-hum day) with the Characters and Setting.  For example, "One beautiful summer day, John and his little sister Karen were walking through the busy park across the street from their house in Speech Town.  The kids enjoyed the hot sun beating down on them and the wonderful smell of freshly cut grass."  I want them to paint that picture just like we practiced with the Character and Setting descriptions.  Some times all I need to do is give that cue of "One day..." and they are able to turn it into a story instead of a list.

Now from here you can do more activities such as character compare/contrast, setting compare/contrast, or you can move onto vocabulary instruction!  Lots of options.  Somewhere along the line (usually after vocab, syntax, morphology, etc. activities) we go back and do deep episodic analysis of the story.  This allows the students to delve deeper into the text and really analyze the structure.  The element identification and oral retelling just scratches the surface whereas a deep episodic analysis pulls out more complex skills.

Monday, August 26, 2013

My Love for Clickers...

During grad school, I worked as a line therapist for the cutest little blonde haired, blue-eyed boy with Autism.  This experience taught me so many things all of which have helped me become the therapist I am today.  Through this job I learned how to manage student behaviors, new ways to model and teach concepts effectively, organizational techniques, data collection methods, and PATIENCE!  :)

The way we kept track of responses during certain tasks was via hand tally counters or what I like to call 'clickers.'  These clickers made is SUPER easy and fast to keep track of right vs. wrong responses.  I loved them so much that I bought some for my classroom!  


I use these clickers for all of my articulation/phonology sessions and they have been a huge help as I never even have to look down while I'm working with a student like I would with a pen and paper to keep tallies.  Makes things go much quicker.  When I work with a student, I bring my set of 2 clickers (attached to a keychain hook/clip- see image below).  The colored clicker always represents CORRECT responses and the chrome clicker always represents INCORRECT responses.  Stays consistent that way.  I also always hold them in the same hands so I don't have to look down.  So I always hold the colored clicker (correct responses) in my right hand and the chrome one (incorrect responses) in my left hand.


I have 3 sets of clickers (red/chrome, yellow/chrome, and green/chrome) in my room so I can work with multiple kids at once if needed, but usually I'm with my artic kids one-on-one because I use the 10 Minute Kids approach.  I try to schedule in a block of time where I can just go from classroom to classroom and pull the student for a quick 10 minute articulation drill in the hallway.  I use this approach for the kids who only have a few errors- nothing severe.

I refer to the numbers on my clickers as 'points' with my students and they get really excited to try and beat their previous number!  It's a great motivator.  After the session, I just write down their numbers on my sticky label and if I'm feeling really ambitious I calculate the percentage right away too!

So there it is.... I heart my clickers :)  

Saturday, August 24, 2013

Back to School Night Activity

Welp, as I say at the end of every summer, "it went by WAY too quickly!"  Our Back to School Night is already next week Thursday and I don't feel ready at all!  I don't know about you, but students and parents are so busy in their homerooms on B2SN that there isn't a whole lot of traffic over by the speech room!  Plus my room is in the back of the school tucked away in a little corner so last year I set up shop in a high traffic area with the music and art teachers just to greet everyone and point them in the right direction.  This worked pretty well.  

As I was browsing through the Speaking of Speech Help Line, I came across a post by Dawn Moore over at Expressions Speech offering up a fun little activity for parents and students on a night like B2SN.  I took a look and IT IS PERFECT!  The activity is an IPA transcription task which I think everyone will have a lot of fun with.  She even has a page defining what IPA is as well as an answer page!  Definitely handing these out next Thursday :)


You can access the documents HERE.  Once you get to that page, scroll all the way down to Family Night Activities and you will see 4 links to the activity pages.  I will probably try and get the intro and list of words on the same page and then get the answers on the back of that page to save on some paper.  

Thanks for the great idea Dawn!

Monday, August 19, 2013

Robust Vocabulary Instruction: Sample Lesson!

Alright, so now that you've had some time to process all of the information I posted last week regarding robust vocabulary instruction of tier 2 words, we are ready to move on!

The robust instruction approach proposes a 5-day cycle, and while that would be ideal, it just may not be reality for many of us speech teachers as we only see our kids 1-3 times per week for only 30 minutes on average!  Here's how I try and block out my vocabulary instruction:

Day 1:  Read text selection, take Pre-Test
Day 2:  Vocabulary Journal/Introduce all words
Day 3:  Vocabulary Questions, Brainstorming Topics, Matching Comments, provide them with carryover activities
Day 4:  Review vocabulary words, Post-Test

So basically I block out TWO WEEKS for my vocabulary instruction.  Most of my language groups are 2x per week.  

To get a better idea of how I do each activity listed above, open up my SAMPLE VOCAB PACKET for the book 'The Stranger' and follow along!


Vocabulary Journal:

  • I provide all of my students with the full vocabulary packet.  This is especially helpful for the Vocabulary Journal section to save on time.  I originally had the students write everything down in a notebook but it was just taking way too long.  So I typed up the journal and took out some words and added blanks instead.  This way they still had to follow along with the lesson as they had to write the appropriate word in the blank.  I don't always leave out the actual vocabulary word.  I usually pick out words important to the overall meaning or sentence.  In my sample I provided you with the entire definitions/sentences so you know what it's supposed to say! You can take out whichever words you want.
  • For the first bullet point in the journal, I just show the students the page the word originated from and read the entire paragraph so provide more context.  We just write the actual sentence the word is in though.
  • For the second bullet point, we talk about the definition.  We use a website called COBUILD.  This is a fantastic website that provides you with student-friendly definitions so they actually make sense to kids (and adults)!!  
  • Third bullet point is an additional sentence that uses the word.  You can make one up or sometimes COBUILD provides extra sentences.
  • Last bullet point allows for interaction with the word.

Vocabulary Questions:
  • For this section, I either read the questions to the group and they answer out loud OR they work in a group and write down there answers before discussing with me.
Brainstorming Topics:
  • For these I usually give a few examples then have the students work together to make the lists and discuss.  Then we come together as a group and talk about what they came up with.
Matching Comments:
  • We usually do this section as a big group.  I say the comment and they tell me which word it goes with.
Sentence Stems:
  • I actually don't do the Sentence Stems as an additional activity.  I use this task as my Pre and Post tests.  I often create the Pre and Post Tests on Edmodo which the kids love!  Check out my previous post to find out more about Edmodo (basically a Facebook for education).
Vocabulary Carryover:
  • I pick a few different tasks for the students at the end of Day 3 to promote carryover.


I hope this all makes sense! Please let me know if you have any questions or feedback!

Wednesday, August 14, 2013

Robust Vocabulary Instruction of Tier Two Words: The Facts

During my first year as an SLP, I didn't really know exactly how I wanted to teach vocabulary.  I tried doing a Word of the Day, having students write down words and definitions in a notebook, pre-teaching curriculum vocabulary, teaching prefixes, suffixes, and root words, and many others.  I kept switching around because I didn't feel like any of those approaches were really helping the students in the long run.  They were just a temporary bandage.  The kids rarely used the words outside of my lesson since it was just a quick memorization task basically and then they could forget about it.  I wanted something that was engaging and that would truly enhance their spoken communication outside of the therapy room.

I researched a bunch of different methods/books and finally landed on 'Bringing Words to Life: Robust Vocabulary Instruction' by Beck, McKeown, and Kucan.   I barely got past the first chapter and was already hooked!  *I bought the first edition but apparently now there's a second edition!  Get it HERE.


Here is the little book description blurb from Amazon.com:

Hundreds of thousands of teachers have used this highly practical guide to help K-12 students enlarge their vocabulary and get involved in noticing, understanding, and using new words. Grounded in research, the book explains how to select words for instruction, introduce their meanings, and create engaging learning activities that promote both word knowledge and reading comprehension. The authors are trusted experts who draw on extensive experience in diverse classrooms and schools. Sample lessons and vignettes, children's literature suggestions, end-of-chapter summaries, and "Your Turn" learning activities enhance the book's utility as a classroom resource, professional development tool, or course text.

I loved this book so much that I wanted more examples and information so I went and purchased their next book 'Creating Robust Vocabulary: Frequently Asked Questions & Extended Examples.'  Check it out HERE.  This one is even more helpful than the first as it provides a ton more details and examples!!  If you want my honest opinion, you can skip the first book and go right to the Extended Examples one.  It provides a nice little review so you can really get all the info you need out of that book alone :)


What are Tier Two vocabulary words you ask?  Well I will start by defining Tier One and Tier Three...

  • Tier One words:  everyday, basic, familiar words
  • Tier Three words:  words that are very rare and ones that are domain specific (i.e. science, social studies vocabulary)

So now you can slide Tier Two words right in between those two and you get, according to Beck, words that are more sophisticated than the basic set but of high utility for literate language users.  Students are less likely to run into Tier Two words in everyday oral language therefore learning these words comes primarily from interaction with books. Tier One words occur in everyday conversation and meanings are more easily implied based on intonation, gestures, body language, etc.  Tier Three words are more specific and aren't used often in daily language. So the main take-away message regarding tiers is that they do not necessarily correspond to words that are hard, harder, and hardest but instead the role they play in language.

Here is the basic outline they propose for a 5-day robust instruction cycle:

Day One:  Selection is read and discussed.  Pull out some words that are necessary to overall understanding and BRIEFLY clarify them during the reading or before reading.  Key word there is BRIEFLY because stopping frequently during the read-a-loud hinders comprehension.

Day Two:  Introduce each word (pick approx 4-7 words) by providing the following information:

  • the context in which the word appeared in the story
  • a student-friendly definition (www.COBUILD.com)
  • an additional context the word might be found
  • an opportunity for students to interact with the word
Day Three:  Ask the students to respond to related questions (1 question per word) using the target words (e.g. Would someone show fear or joy if they saw something ominous?).  Then have students create a list based on brainstorming about the words (e.g. Describe some ominous situations).

Day Four:  Ask students to match targeted words with related comments (e.g. "That sounded like the wind is getting wilder").  Ask students to complete sentence stems (e.g. An ominous sight in a forest might be seeing...).  Have students think about vocabulary words outside of the classroom with different activities (i.e. Have students find an ominous situation in a TV show they're watching or a book they're reading).

Day Five:  Review of vocabulary words and assessment.  They propose assessing student knowledge in either a True/False format or Completing Sentences to truly find out their understanding of the words.  So basically more sentence stems.


______________________________

I will give you a little time to digest all of this information and then I will do another post on how I have modified the approach to work for me!  This approach is geared toward regular classrooms that have 5 consecutive days to do this and obviously we don't have that kind of time!  So with some little adjustments I have been able to make it work for my 30 minute pull-out sessions.  I mean not all of those things crammed into one session, but spread out amongst a few sessions using different methods to speed some things up.

Does anyone else use this method? Have you heard of it before? 


Tuesday, August 13, 2013

1st Place!

The high school dance team that I coach attended pom camp last week and they did amazing!  It was their first time at this camp and I am just so proud of their effort and attitudes.  I was there with them and just loved seeing them come together as a team and have a blast!

We brought a routine from home to compete at camp and it ended up taking 1st place in our division!!!!  Here is my team performing Joyful Sound:


Placing 1st in our division with this routine got us an invite to another competition next weekend!  We have been cleaning it up a little bit and getting it ready to compete again :).  

Wish us luck!!

Monday, August 12, 2013

Whiteboard Word Wall

For the first half of my first year in my classroom, I had a pretty standard word wall.  I had the letters taped on the wall (well actually a door in my case) and then I typed up the vocabulary words, printed them, laminated them, and taped them onto the door next to the corresponding letter.  Well I realized pretty quickly that it was a big hassle to sit and type up the words, print, and laminate them.  There had to be an more convenient way to do it!

I then changed it halfway through the year and it looked like this:


While I think it LOOKED nice, it just wasn't functional.  I had a piece of paper stapled in each file folder where there was room to write in the word.  It was definitely easier since I didn't have to type, print, and laminate the words anymore, but they weren't visible to the kids so they didn't utilize it!  Fail.

So last year I decided I wanted something that was super easy to update, visible, and appealing.  Enter the whiteboard word wall!


This worked out great!!  I had a little bucket of dry erase markers next to the board and when a new vocabulary word was introduced, either the kids or myself went and added the word.  

Now if you don't have an actual whiteboard, not a problem!  I went and got a big piece of white panel board from Home Depot and it works just like a whiteboard!!  Got the idea from the blog Ladybug's Teacher Files.  Our janitor was nice enough to mount it to the wall for me :).  The round alphabet signs are from that same blog- you can find them here.  I just printed them on lime green paper so the letter and boarder will show up in that color.

Do you all have a word wall?  If so, how do you set it up??

Sunday, August 11, 2013

No Bulletin Boards...No Problem!

I was very fortunate to be given a classroom with a lot of space, a SmartBoard, AND a window!  However, there was only 1 bulletin board, no chalkboards, and no whiteboards.  I searched online for some big bulletin boards and quickly realized they are SUPER expensive!!  One night, I came across something on Pinterest that made me think "I wonder if these would work as make-shift bulletin boards?!"  They were those big tri-fold boards that they carry at Wal-Mart for only a few bucks.  Sure enough, they worked wonderfully!


I actually did end up finding two ACTUAL bulletin boards in the storage room at my school that no one was using so I took those and then bought 2 black tri-fold boards.  Can you tell which ones are which?!?!

I am actually thinking of buying 4 more and making them into 1 giant bulletin board for that adjacent wall just because I love the black background :)

Friday, August 9, 2013

Ways to Help Students Memorize SGM Symbols

If you are using the Story Grammar Marker program, it is really important to provide the students with ample opportunities to memorize the different symbols.  When I first got the program, I jumped right into teaching what each symbol meant and giving lots of examples.  While the kids eventually did catch on, I learned that I should have started with just naming each symbol and making sure the students had those names memorized.  Once they knew the names of each symbol, I could move onto a more in-depth description of what that symbol meant and how it related to a story.

Here are some activities I had the students participate in to help with memorization of symbol names:

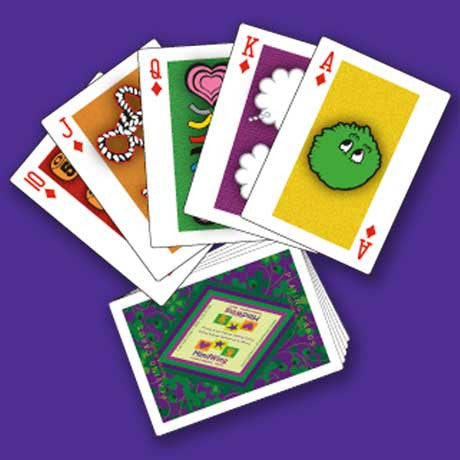
1) Mindwing's Card Deck:  It took me awhile to purchase this card deck because I didn't think it was completely necessary but now I LOVE it!  It's a great way to get the kids a ton of practice with SGM symbol identification and they have a lot of fun with it too!  We primarily played 2 games with these cards but I'm sure there are many more you could play.
  • Go Fish:  We play just like the regular Go Fish game is played.  Each student was given 7 cards and then we went around the circle asking questions.  "Do you have the Setting?" "No, Go Fish." Pretty straightforward.
  • War:  If there are only two kids in the group then I have them play this game.  Also if there is just one student then I play the game with them.  Same as the normal War rules but with a SGM twist.  The deck is divided into 2 and given to each player.  The players lay down their top card at the same time, say what symbol they have, and determine which one is higher (by the numbers on the card).  Player with the higher number keeps the cards.  So basically the only difference is the students have to state the symbol they have before anyone can get the cards.
These card games really seem to speed up the memorization process so they have a good base knowledge of symbol names going into the next phase, which is teaching them how those symbols relate to a story.

MindWing's Card Deck - (Item No 04 050)

2)  Dice Game:  I downloaded an app on my iPad called Make Dice Lite where you can create your own dice and the students can press a button or shake the iPad to roll them.  I made some dice with a story grammar element on each side.  Each player takes a turn rolling the dice and then uses their student SGM tool/braid to point to the corresponding symbol.  I then just give the student a bingo chip if they get it right.


3) "Show Me":  This is a super simple activity where all you need are the student braids.  Each student has a braid and I simply say "Show me the Setting" and the students scramble to point to the Setting symbol.  The student who identifies the correct symbol first, gets a bingo chip.  


Does anyone use any other activities to help with symbol memorization??  I would love to hear about them!!